Data Center Fabric Management and Telco Cloud | Demo

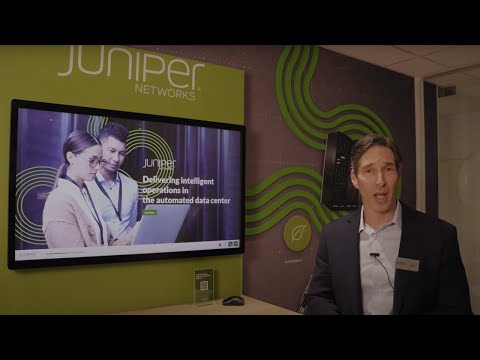
Delivering intelligent operations in the automated data center.
Experience the automated data center and telco cloud with simplified Day 0, 1 and 2 operations and cloud-native agility. Unlock the benefits of Juniper Apstra and Cloud-Native Contrail Networking (CN2).
To learn more about our Telco Cloud solutions: https://www.juniper.net/us/en/solutions/telco-cloud.html
You’ll learn
How to rollout a new network service across thousands of locations in record time
Why an intent-based model that is reliable, repeatable and multi-vendor is critical for scaled deployments
Who is this for?
Host

Transcript
0:00 [Music]
0:01 hi I'm John Mitchell and I'm director of
0:03 marketing for Juniper's cloud ready Data
0:05 Center and welcome to mwc Barcelona
0:08 2023. in this demo we're going to be
0:10 focusing on Juniper's automated data
0:12 center imagine that you're a service
0:14 provider we connect and you've got
0:16 thousands of locations around Europe
0:18 particularly here in Spain and you're
0:20 trying to roll out a new video service
0:21 before mwc Barcelona what do you do well
0:26 it's pretty difficult to do if you are
0:28 doing it manually almost impossible to
0:30 do anything like that at Telco scale so
0:32 we're going to use our automated data
0:34 center Tools in order to simplify the
0:36 deployment and make it easy for you to
0:38 get these these products out the door
0:39 the automated data center is built
0:42 around a intent-based model so that you
0:45 don't have to worry about CLI it's
0:46 reliable so it's repeatable and it's
0:49 multi-vendor so you can decide on the
0:51 products that you want to deploy based
0:54 on let's say Port density performance
0:56 cost or maybe it's a supply chain issue
0:58 and you need to look at an alternative
1:00 vendor so what I'm going to do in this
1:01 demo is I'm going to walk you through
1:03 developing a rack deploying virtual
1:06 networks across a multi-vendor rack and
1:09 then how we deploy Telco Services across
1:11 a high performance server and do it in
1:14 record time we're going to start off
1:16 with deploying app store app stores are
1:18 multi-vendor data center IP fabric tool
1:21 it allows you to take what would
1:24 normally take days possibly weeks and do
1:29 it in minutes so we're going to deploy a
1:31 rack
1:32 so here we have we connect trying to
1:35 deploy a new video service and they need
1:37 to add racks to their different
1:38 locations so again we connect as data
1:41 centers they have Telco clouds they have
1:43 Edge clouds all throughout Spain if
1:45 you're going to do something like this
1:47 it's possible to do it manually but it's
1:50 impossible to do anything at Telco scale
1:52 when you're dealing with CLI I'm going
1:54 to show you how Appstore does it we
1:56 currently have in this particular
1:57 location a two-spine environment with
2:01 one leaf what we want to do is we want
2:03 to add two new leaves to this and we're
2:05 going to use templates in order to do it
2:07 so you don't have to configure this
2:09 manually you can define those those
2:11 templates those templates are
2:13 incorporated into and delivered through
2:15 App Store and we can apply them without
2:17 a whole lot of product knowledge so we
2:19 go to racks we're going to go add rack
2:21 and here we're going to select from a
2:24 set of predefined templates the type of
2:27 rack that we want to deploy in this case
2:29 it's an evpn ESI rack which is kind of
2:32 like multi lag so here we're adding the
2:35 two leaves we have a dual connected
2:38 server and then two single connected
2:40 servers now we're going to add this into
2:42 our existing environment and Stage IT
2:45 next we have our topology so now we've
2:49 added the two leaves to our existing
2:51 environment and we need to drill in and
2:54 start to add the products so at this
2:56 point we just have the topology we
2:59 haven't picked any platforms yet so what
3:02 we're going to do here is start with the
3:03 interface map the interface map defines
3:05 the number of ports the type of ports
3:07 are these uplinks or the axis interfaces
3:09 it's not defined based on vendor type so
3:12 in this case we're going to go in we're
3:13 going to select from a set of menus and
3:15 you'll have these many drop down menus
3:17 that allow you to pick the type of
3:19 interface map that you want in this case
3:21 we're picking a qfx and by default it's
3:24 going to pick the platform as a qfx
3:26 itself next everything gets staged so in
3:29 this case we can batch everything so
3:31 theoretically you can build your
3:33 topology have it ready to go but you can
3:36 do it with without having a single
3:37 product in-house this allows you to
3:39 streamline the process of getting your
3:41 deployments ready and once that
3:43 equipment ships on site you can deploy
3:45 so here Appster goes through a check
3:48 process where we validate the
3:49 configurations we commit those
3:51 configurations to a live Network and we
3:54 converge so you're ready to go now we
3:57 have the topology but now we're going to
3:59 add virtual networks to this environment
4:01 these virtual networks are going to add
4:03 compute storage and networking so that
4:05 we can extend our service to a broad
4:09 customer base we're going to do this
4:10 without any CLI so when you're adding
4:13 any type of of network or racks to your
4:16 system there's a whole lot of things
4:18 that you have to do you've got to Define
4:20 your topology and your connectivity
4:22 you've got to Define Network IDs and IP
4:25 addresses get the design your routing
4:27 environment and then you have to type it
4:29 out but not if you use an app store apps
4:31 it allows you to do this without
4:32 understanding or knowing clis which is
4:35 which is great when you have
4:37 environments where you're not sure which
4:39 products are going to be in demand and
4:40 you're not sure what expertise that you
4:42 have in-house in order to deploy the
4:44 product
4:45 let's add this capacity and we're going
4:46 to use apture to do it so we're back in
4:49 another environment where again we have
4:51 two spines we have three leaves
4:53 this is a multi-vendor rack so we're
4:55 just gonna drill down a little bit into
4:57 this existing deployment and we see that
4:59 we have an Arista pair on one side
5:01 [Music]
5:02 and then we're going to drill down into
5:03 Leaf three and we can see that this is a
5:06 Cisco device
5:08 so now we're going to Define our virtual
5:09 Network
5:11 so in this case
5:13 we go to our ad virtual Network screen
5:15 so you can see that we've got a name for
5:18 the virtual Network it's Finance we're
5:19 assigning it to an existing routing Zone
5:21 kind of finance and I'm going to leave
5:23 these two entries blank right now the V
5:26 and I and the VLAN ID just to show you
5:28 how Appstore goes through to validate
5:29 configurations before they're deployed
5:31 we're going to pick the different types
5:33 of configurations for this particular
5:35 deployment the ATP Services V4
5:37 connectivity Gateway addresses Etc is it
5:40 tagged or untagged and then we're going
5:42 to Define which switches we actually
5:45 want this virtual Network to be applied
5:47 to if you're building a virtual Network
5:48 you don't necessarily want to send it
5:50 out Rogue to every single switch you
5:52 want to be specific so you can kind of
5:54 improve your security and reduce your
5:56 your blast radius so here we're going to
5:59 put it on both switches but we can get a
6:01 little more granular in the next set
6:03 where we can then Define the ports we've
6:05 added our virtual Network so we can see
6:08 its Finance we have our vxlan but you
6:10 see something shows up as red red just
6:13 means that the there's a configuration
6:14 that's incomplete or there's an error so
6:17 here we can see we have to add the vnis
6:19 so we're going to pick from a pool we're
6:22 going to have the v-tep again we're
6:23 picking from a pool and then we can go
6:26 in and Define which ports of those
6:28 switches that we've defined are going to
6:30 actually have that virtual Network now
6:32 we're staged we want to take a look at
6:34 the configuration so we're going to
6:36 drill in a little bit on
6:38 in this case an Arista switch now I
6:40 don't know anything about EOS after has
6:42 rendered the entire configuration based
6:44 on the intent that we've defined leading
6:46 up to the stage so there's no CLI work
6:49 apps are renders that configuration
6:51 it'll do the same thing for iOS it'll do
6:53 that obviously junos and others we then
6:55 stage it and we commit it to the network
6:58 once it's accepted the network is
7:00 converged we turn green
7:02 we want to add a Telco workload now Toca
7:05 workloads a lot of times require very
7:07 high performance so these workloads need
7:09 to be deployed in an sriov host so these
7:12 workloads plug directly into the IP
7:15 fabric in order to connect those
7:18 workloads and those networks in the
7:20 underlay to workloads that are deployed
7:23 by kubernetes and through the the
7:26 overlay networking and sdn for Juniper
7:29 that's our Cloud native control
7:31 networking or cn2 which is again it's an
7:34 sdn and cni built into one
7:37 you need to manually Stitch those
7:39 together up until now so what we've done
7:42 is created a cn2 and Abstract plug-in
7:45 and this plugin allows you to stitch
7:48 these ships in the night networks
7:49 together without creating troubled
7:51 tickets or doing things manually which
7:54 can result in errors so let's walk
7:57 through adding in this case a charging
7:59 function for this video service that
8:01 we're deploying here in Barcelona so
8:04 first we're going to take a look in app
8:06 store we're just going to show that
8:08 there's an existing rack but we don't
8:10 have any existing virtual networks and
8:13 we don't have any existing routing zones
8:16 so it's a blank slate
8:18 so now let's go into the web GUI the web
8:20 GUI lets you define the interface into
8:22 appstra so you put in your credentials
8:25 the location IP addresses the blueprint
8:28 that you're going to be using and this
8:30 instantiates the plugin so that abstra
8:33 and cn2 can communicate with one another
8:35 to actually automate the the building
8:37 and stitching of those virtual networks
8:39 that are both SRI OV hosted and not SRI
8:42 will be hosted so the first thing we're
8:44 going to do in again the cn2 GUI is
8:46 we're going to find the network
8:48 attachment definition now this is the
8:50 same network attachment definition that
8:52 you'll see with multis and cni and we're
8:55 looking at net 20. we're just going to
8:57 drill down in here we're using it we
9:00 have a yaml file and we have our own
9:01 embedded animal editor and we can Define
9:04 what that Network would look like so
9:06 that when workloads are brought up on
9:08 SRI OV we can either dynamically build
9:10 the network to attach that SRI OV host
9:13 or we can attach that new pod to an
9:17 existing Network
9:19 now here we're going to look at pod 20-1
9:21 and we're going to open it up at this
9:24 definition we're going to augment and
9:25 we're going to add in it the NAD
9:27 definition this definition becomes a
9:29 trigger so that when the Pod is created
9:32 abstra sees that net 20 references the
9:35 plug-in itself so that the network is
9:37 automatically built so now we can drill
9:39 down from cn2 to look specifically at
9:43 the state event Network we've created
9:45 the Pod the network is existing here in
9:48 cn2 but the network is also existing and
9:51 connected in app strip so we can see all
9:54 the state all the connectivity and
9:56 everything is working and everything was
9:58 automated we didn't have to issue any
10:00 trouble tickets or do any manual
10:02 configurations in order to stitch these
10:04 two networks to wrap things up Juniper's
10:06 automated data center it's intent based
10:08 so again you don't have to worry about
10:09 clis in order to operationalize a
10:11 network it's reliable meaning that it's
10:14 repeatable so the processes are there
10:16 they're baked into the the workflows and
10:19 it creates consistency in your
10:20 deployment models and it's multi-vendor
10:23 so that you can pick products based on
10:25 your criteria
